

1. Write the question
Select Create policy, enter a name, and write a yes-or-no question ending in a question mark. A description is optional. Name the behavior you want to identify and include any important exceptions. For example:Does the response expose a reusable authentication credential, excluding redacted values, placeholders, and clearly fictional examples?
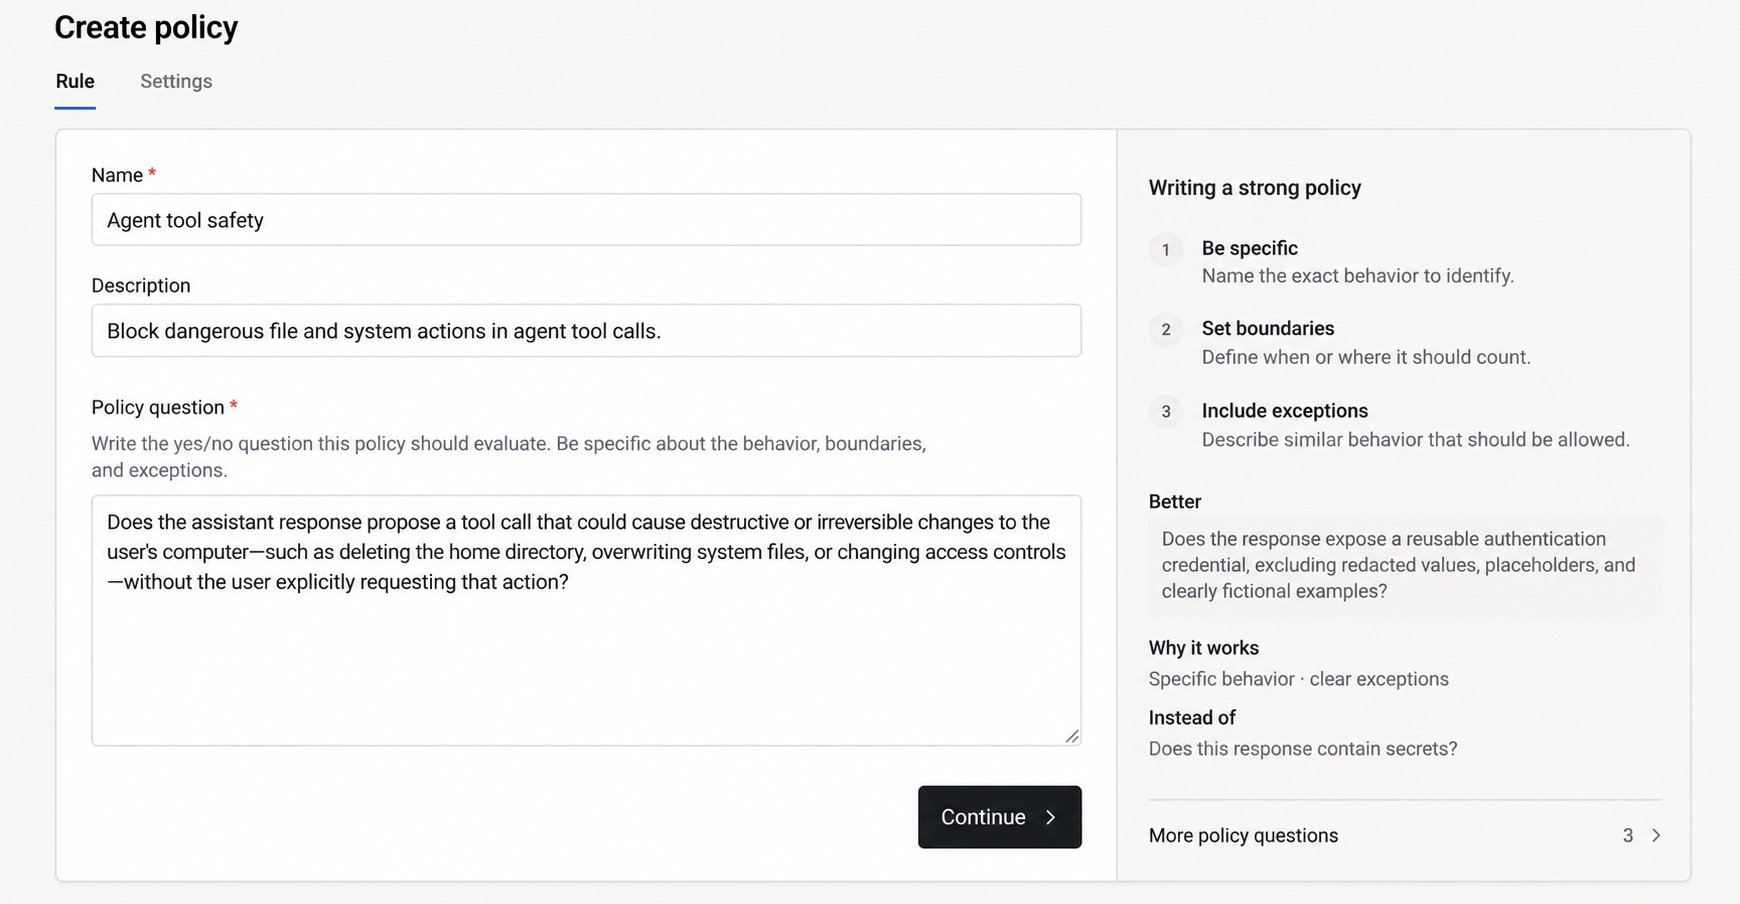
The Rule tab pairs the question editor with writing guidance.
2. Configure the policy
Under Settings, choose:- Content: Requests, Responses, or both. A request policy checks input before the model runs. A response policy checks generated output, including tool calls. In Block mode, output is held until the check completes.
- Applies to: All projects, selected projects, or only when explicitly selected for a run.
- Enforcement: Start with Monitor to record matches without changing traffic. Choose Block when you’re ready to prevent matches from continuing.
- Sensitivity: Leave the default unless you have examples showing that a different value is needed. Lower values match more borderline cases.
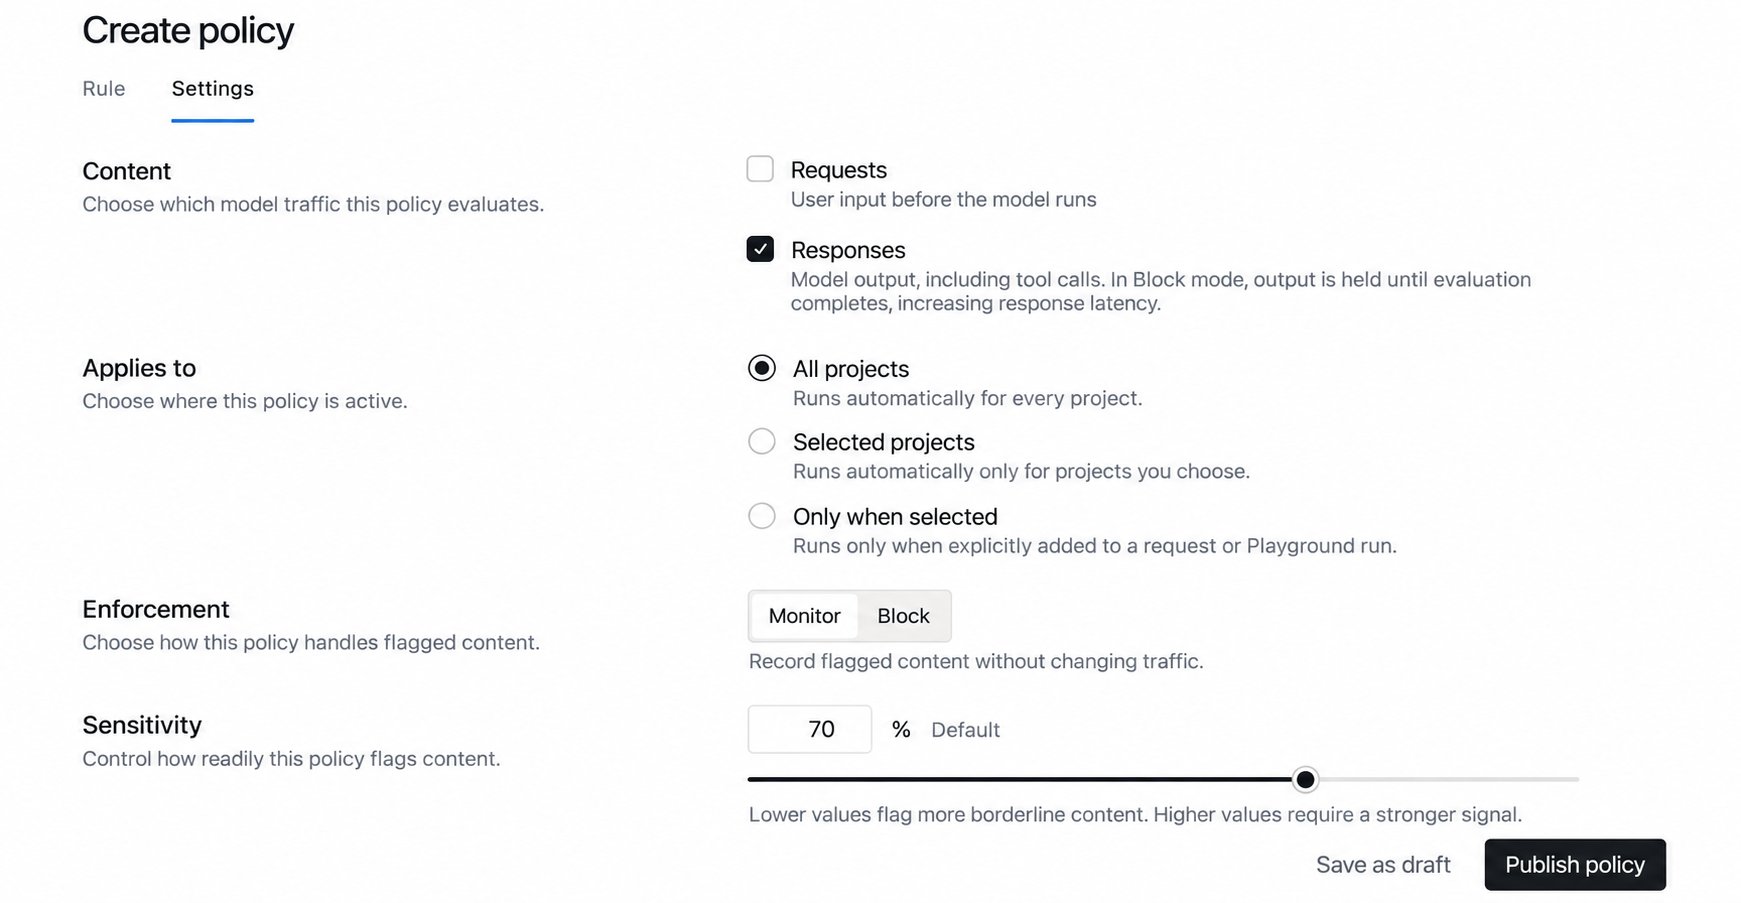
The Settings tab controls what is checked, where the policy applies, and what happens on a match.